Has Nano Banana 2.5 been released? Official Google models and the current selection guide for PixPix.
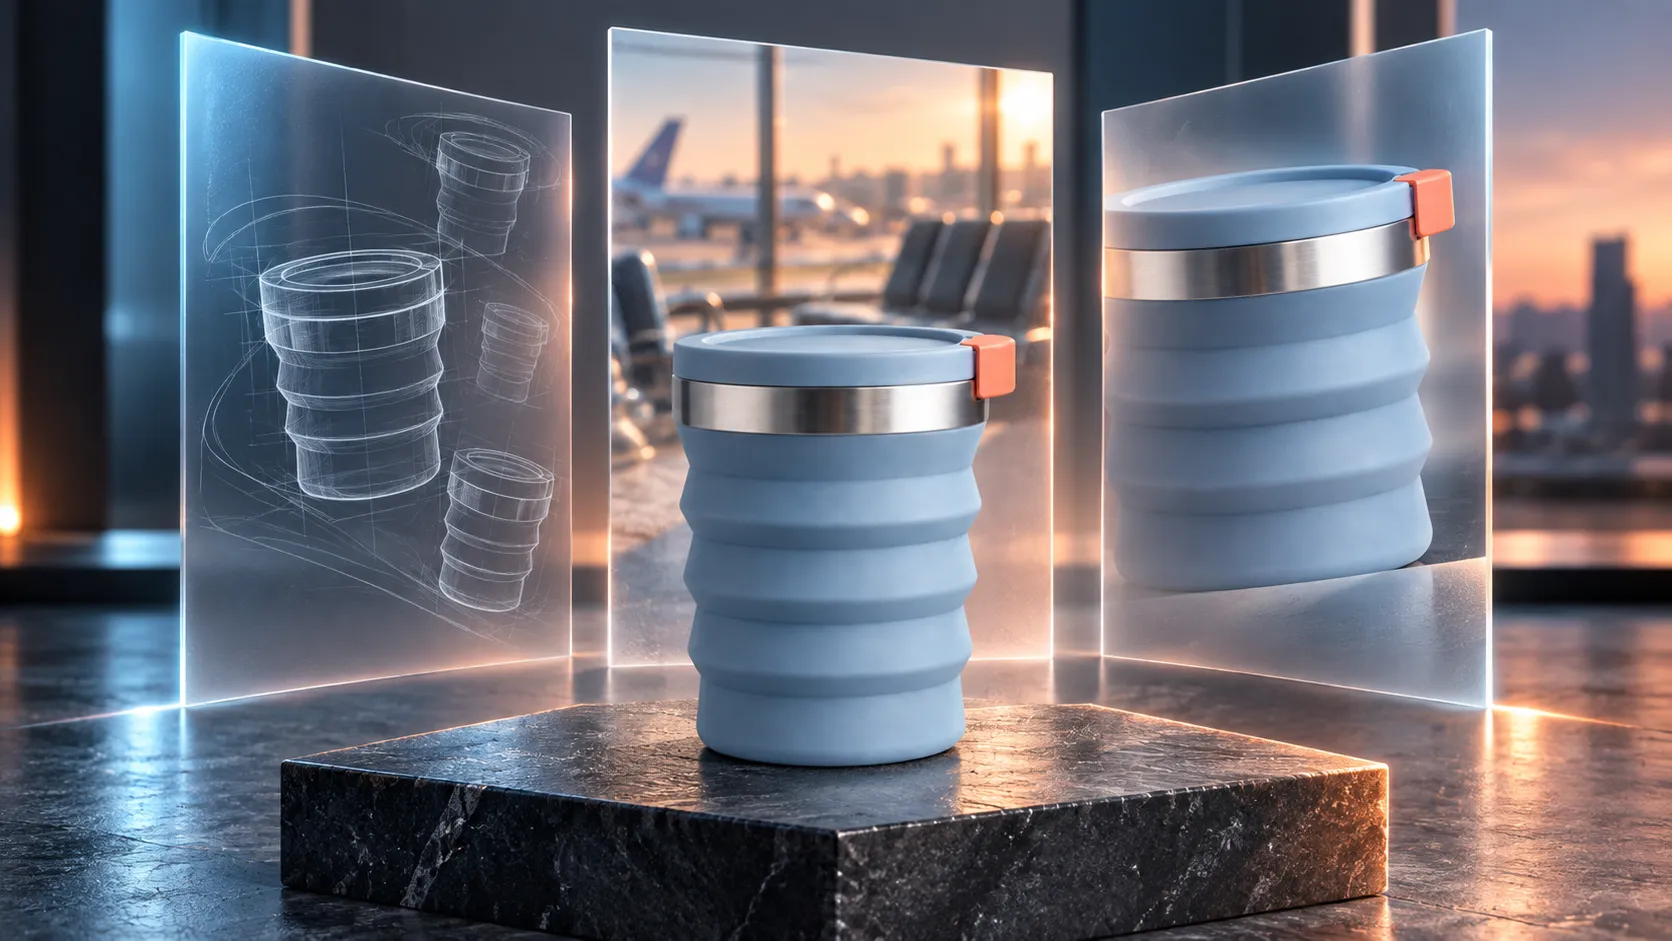
Many people search for “Nano Banana 2.5,” but they’re actually asking two different questions: Is it the new model Google has already released? And if not, which Nano Banana model should I choose in PixPix now?
These two questions must be answered separately. At the time this article was published, “Nano Banana 2.5” was still just a code reference and a term used in community discussions—there was no official release date, price, or public API associated with it yet. Meanwhile, Google’s official documentation had already established another clear naming convention: Nano Banana, Nano Banana 2, Nano Banana Pro, and Nano Banana 2 Lite.
Therefore, this article won’t turn rumors into product announcements; instead, it will first clarify the naming conventions and then provide a straightforward selection and testing method that can be directly applied to PixPix’s currently available products.
Quick conclusion: “Nano Banana 2.5” is not the name of any current official model.
As of the time this article was compiled, neither Google’s official image-generation documentation nor PixPix’s Nano Banana product page lists “Nano Banana 2.5” as an independent, official model.
The most common misunderstanding here is that the original Nano Banana corresponds to Gemini 2.5 Flash Image—where the “2.5” refers to the Gemini model’s generational designation and does not automatically equate to “Nano Banana 2.5.” The “Nano Banana 2.5 Flash” code reference mentioned in the referenced article only proves that such a name existed at the time—it does not independently confirm that the product has been officially released.
If you’re looking to start creating in PixPix right now, a more practical approach would be:
For quickly generating concepts and producing lightweight content in bulk, start with Nano Banana 2 Lite;
If you need to balance speed, reference images, and everyday complexity, prioritize starting with Nano Banana 2;
For complex compositions, precise text, or final key visuals, consider Nano Banana Pro next;
Don’t assume that because “2.5” appears in search results, it means PixPix already offers a new model.
Why did the name “Nano Banana 2.5” emerge?
The referenced article outlines two distinct sources: one is the “Nano Banana 2.5 Flash” code reference discovered by TestingCatalog, and the other is community speculation about anonymous model tags within Arena. It also emphasizes that these clues do not constitute an official announcement from Google, nor have they confirmed functionality, pricing, APIs, or launch timelines.
Such information can serve as useful industry updates, but it’s not appropriate to directly rewrite it into a “new model usage tutorial.” The reason is simple:
Code names do not equal public product names.Testing labels, internal references, and the final brand may differ.
Anonymous models are not equivalent to designated model types.You cannot confirm a model’s identity solely based on output style or community speculation.
Old article statuses do not reflect today’s product conditions.Pre-release rumors must be cross-checked against current official documentation.
Therefore, when you encounter “Nano Banana 2.5,” your first step shouldn’t be searching for hidden entry points—but rather checking Google’s official model list and the model selector on the platform you’re using.
Don’t mix up the four official names.
Google’s current image-generation documentation divides the Nano Banana series into four distinct tiers. PixPix’s publicly available pages currently offer three of the newer creative options.
Commonly used names | Official Google counterpart | Tasks suitable for trying first | PixPix’s currently public page |
|---|---|---|---|
Nano Banana | Gemini 2.5 Flash Image | Understanding the original workflow and maintaining legacy projects | Not recommended as the primary option on Nano Banana’s current homepage |
Nano Banana 2 Lite | Gemini 3.1 Flash Lite Image | Quick concepts, lightweight content, batch drafts | Already publicly available |
Nano Banana 2 | Gemini 3.1 Flash Image | Everyday general creation, reference image generation, and continuous adjustments | Already publicly available |
Nano Banana Pro | Gemini 3 Pro Image | Complex compositions, brand visuals, precise text, and high‑end deliverables | Already publicly available |
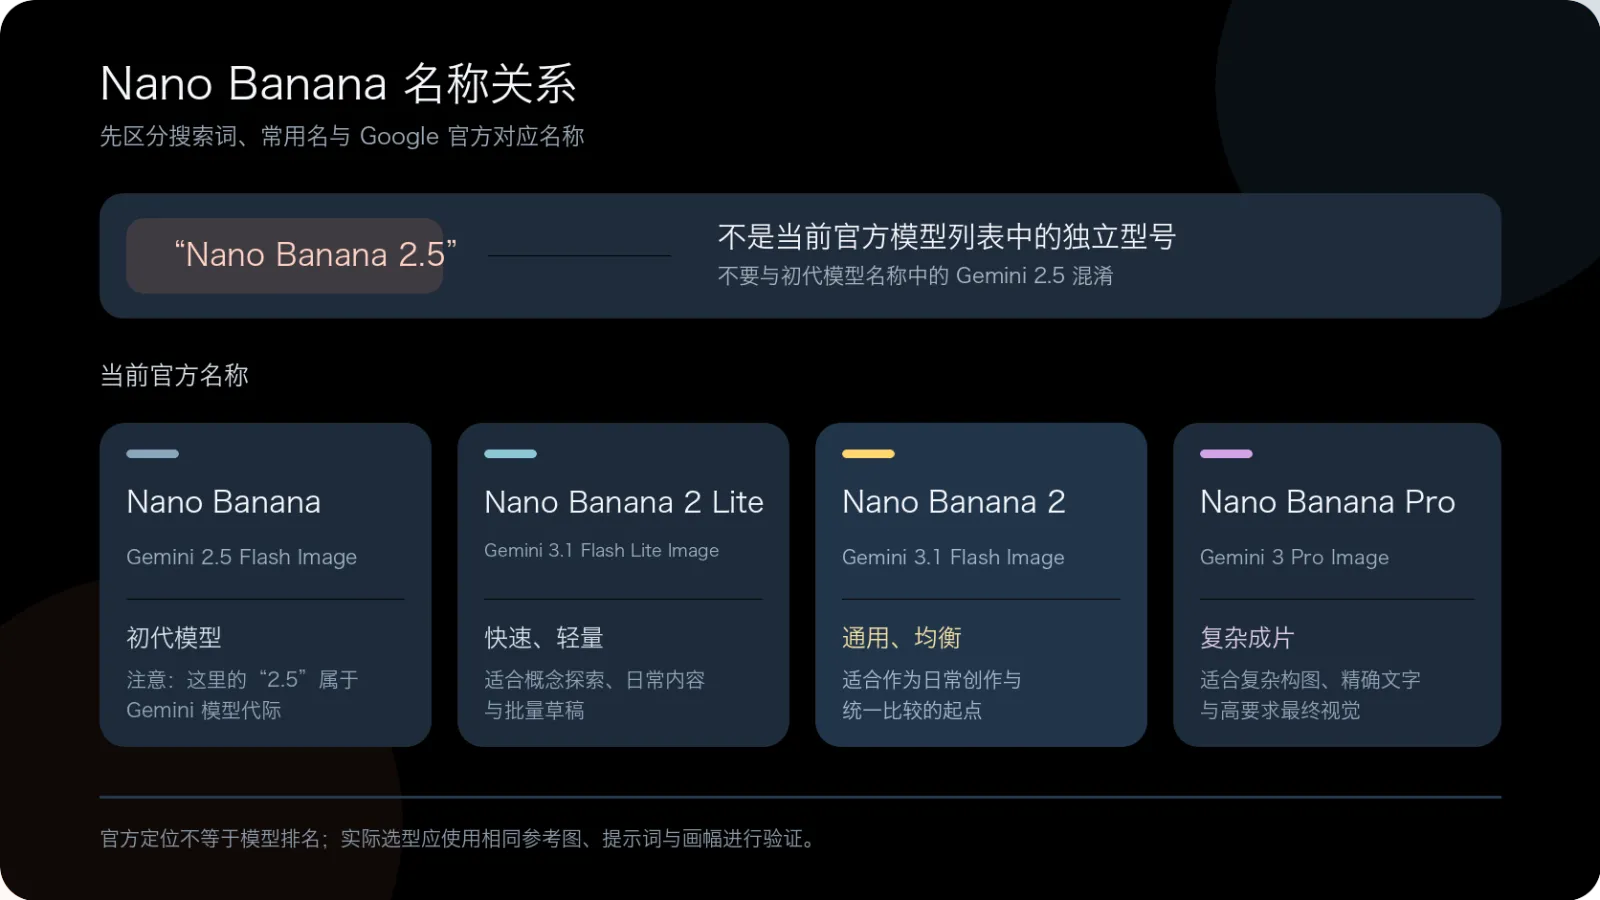
Caption: “Nano Banana 2.5” is a search term that requires verification; it is not an independent model listed in the current official lineup. The four cards below differentiate between common names, Google‑aligned designations, and task positioning.
This table reflects official product positioning rather than benchmark scores under identical conditions. Whether a particular model best suits your task still needs to be verified using the same input.
How to choose within PixPix: prioritize tasks over model numbers first.
Nano Banana 2 Lite: Rapid exploration and batch drafting
When the goal is quickly exploring directions, generating social media content, or building a set of visual drafts, lightweight models are more appealing. They’re ideal for putting “whether the idea works” first—for example, comparing three scenes, two compositions, and different aspect ratios upfront.
However, if your task relies on multiple reference images, long‑term continuous editing, or extremely strict detail control, don’t rush to finalize simply because a model is fast. First verify whether characters, product structures, and text can withstand further rounds of revision.
Nano Banana 2: A versatile starting point for everyday creative work
PixPix positions Nano Banana 2 as a balanced choice between speed and capability. For most image‑to‑image tasks, lifestyle scenes, poster drafts, and iterative edits, you can begin here before deciding whether to upgrade or downgrade.
Its value isn’t that it excels at every task, but rather that it serves as a unified baseline: running the same reference image, prompt, and aspect ratio once allows meaningful comparisons among subsequent models.
Nano Banana Pro: Complex Compositions and Precise Control
When an image includes multiple objects, clear spatial relationships, brand packaging, or text that needs to be rendered accurately, Nano Banana Pro can be considered as a final candidate. In complex tasks, greater reasoning and control capabilities are often more important than simply striving for the fastest initial rendering speed.
However, “Pro” does not mean you can skip checks. Text, trademarks, regulatory information on packaging, human hands, and product interfaces should still be carefully reviewed item by item before exporting.
A reusable test case: Visuals for a new foldable travel cup
Suppose you need to create a set of new visuals for the original product “FoldCup Foldable Travel Cup.” The product’s identity rules are as follows:
A mist-blue silicone body with three wide horizontal folds;
A brushed-silver rim;
A coral-orange locking mechanism, appearing only on the right side of the lid;
No existing brand logo; no borrowing from real‑world product designs.
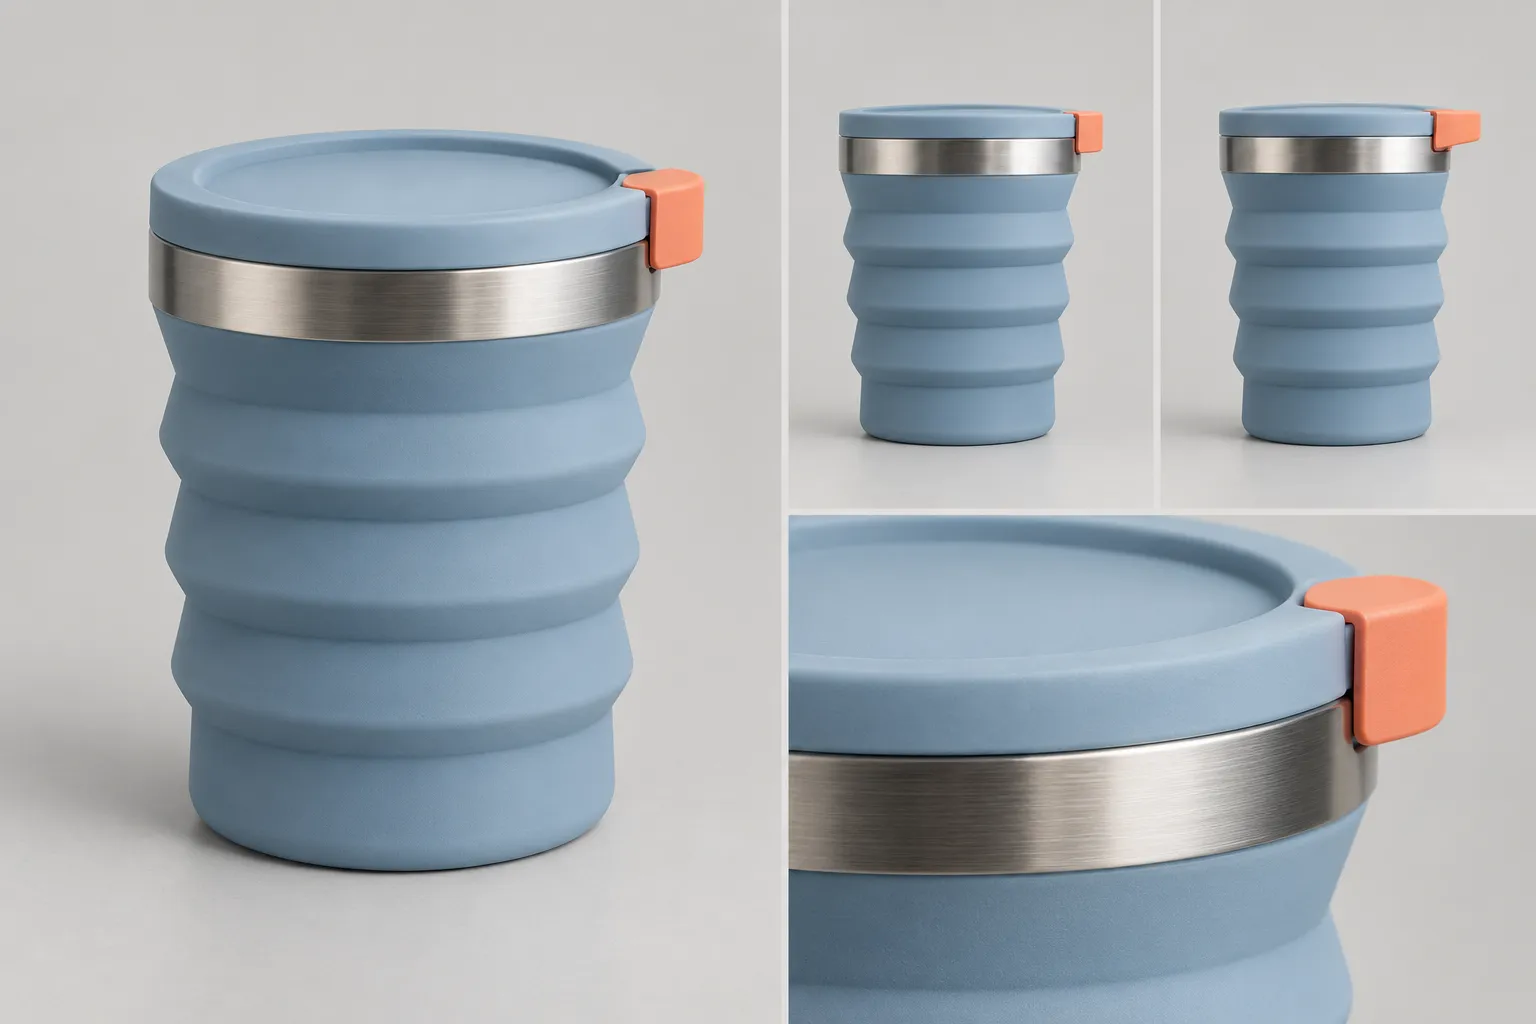
Note: The master version of the product first establishes the mist-blue body, three wide folds, silver rim, and the orange lock on the right side; subsequent images will only vary in scene or lighting.
Don’t start by writing separate prompts for each of the three models. Instead, prepare one master product image first, then break the same task into three stages.
Stage One: Validate Concept Direction
First, have the model generate three scene drafts: an airport waiting area, an urban desk, and an outdoor wooden table. At this stage, focus solely on whether the product fits the scene, whether the subject is clear, and whether the composition leaves room for further layout—do not rush to judge the final texture yet.
You can use a basic prompt like this:
Using the foldable travel cup shown in the reference image as the sole product, keep the mist-blue body with three wide folds, the silver rim, and the coral-orange lock on the right side unchanged. Generate a modern lifestyle photograph set in an airport waiting area, placing the travel cup at the center of a light gray stone side table, against a softly blurred backdrop of floor-to-ceiling windows and boarding gate lights, illuminated by morning natural light. The product occupies about half the height of the frame, with no human hands, text, logos, or additional utensils visible.
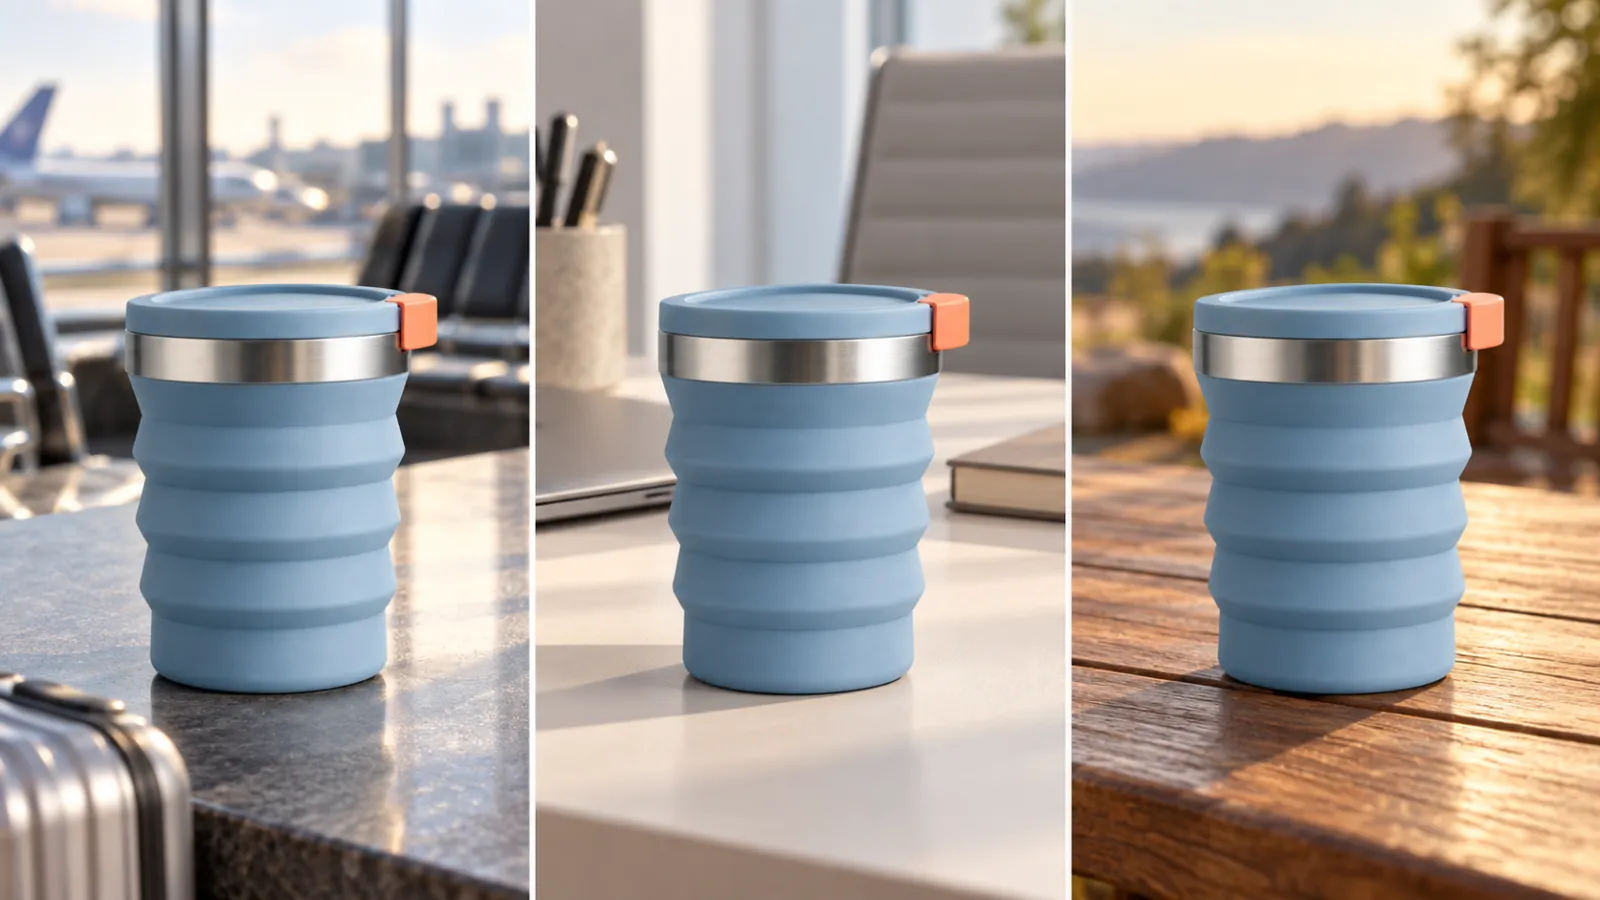
Note: The same product appears in the airport, office desk, and outdoor wooden table scenarios, allowing comparison of scene direction and compositional space. This series is an original instructional illustration, not a direct comparison of results from three different models.
Stage Two: Verify Consistency with Reference Images
Choose one of the three scenes to proceed. Focus on checking the cup’s proportions, number of folds, position of the lock, and material and color of the rim. If any of these identity features change, prioritize fixing the product itself rather than continuing to layer backgrounds or decorations.
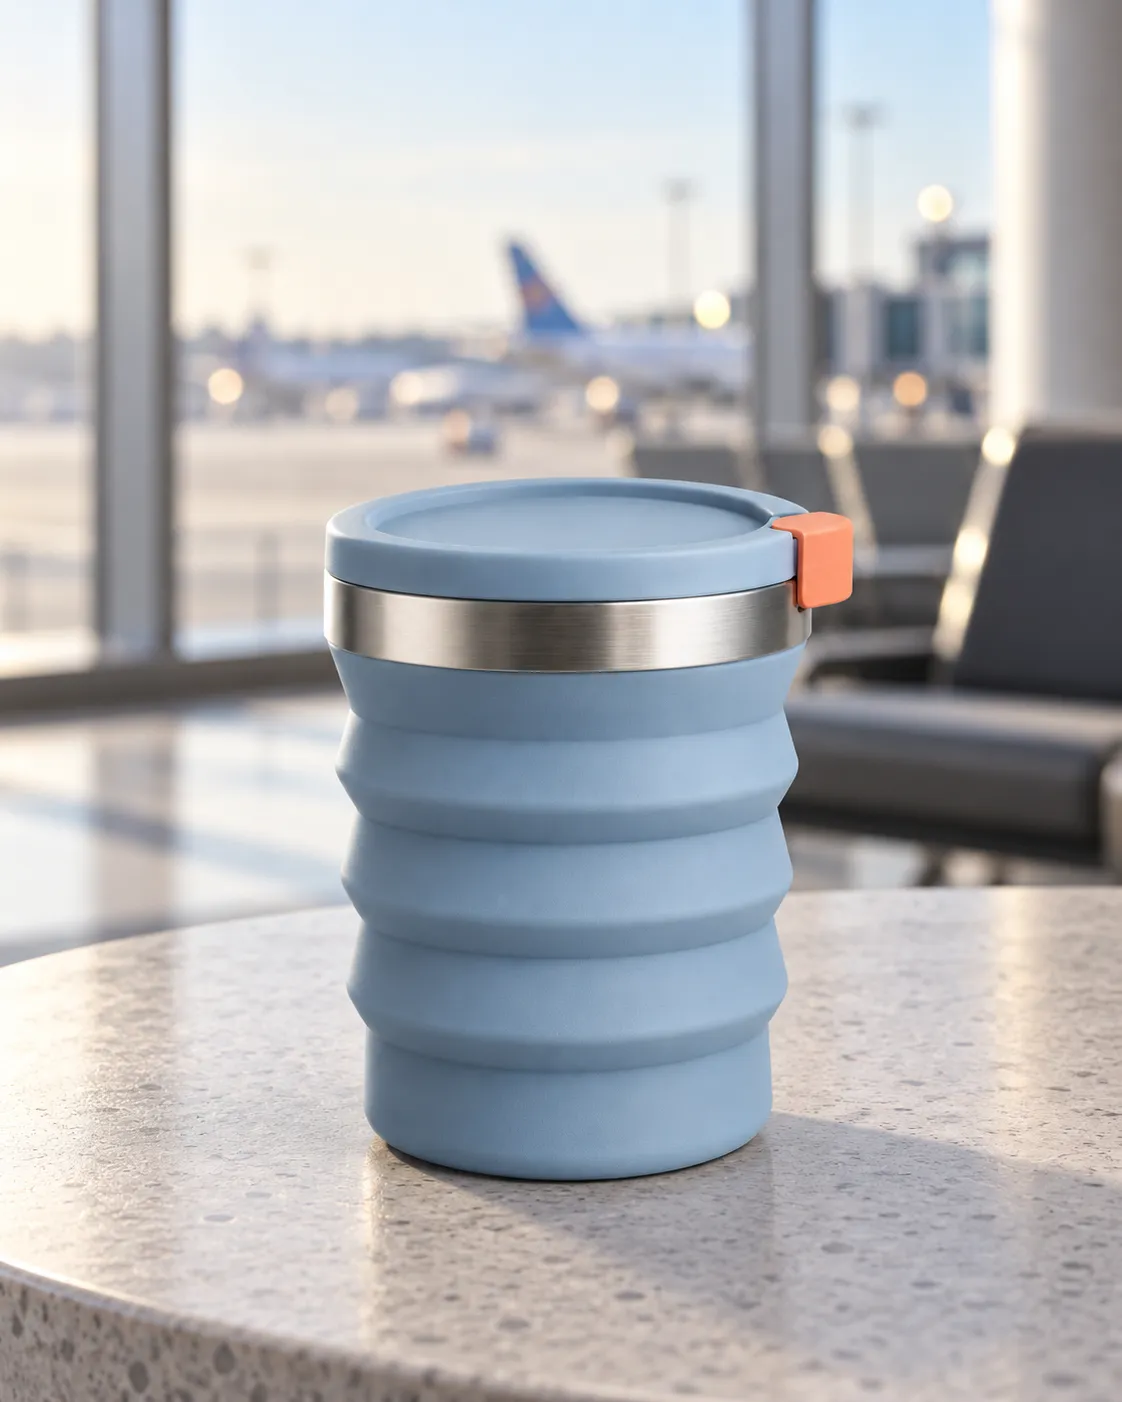
Note: After entering the airport lifestyle scene, continue verifying that the cup’s proportions, three wide folds, silver rim, and right-side orange lock remain consistent.
When revising the prompt, clearly specify “what changes and what stays the same”:
Only change the background time to evening, adding subtle blue‑purple city lights outside the window; keep the travel cup’s size, position, three wide folds, silver rim, right-side coral‑orange lock, camera angle, and shadow where the cup touches the table completely unchanged, without introducing any new objects.
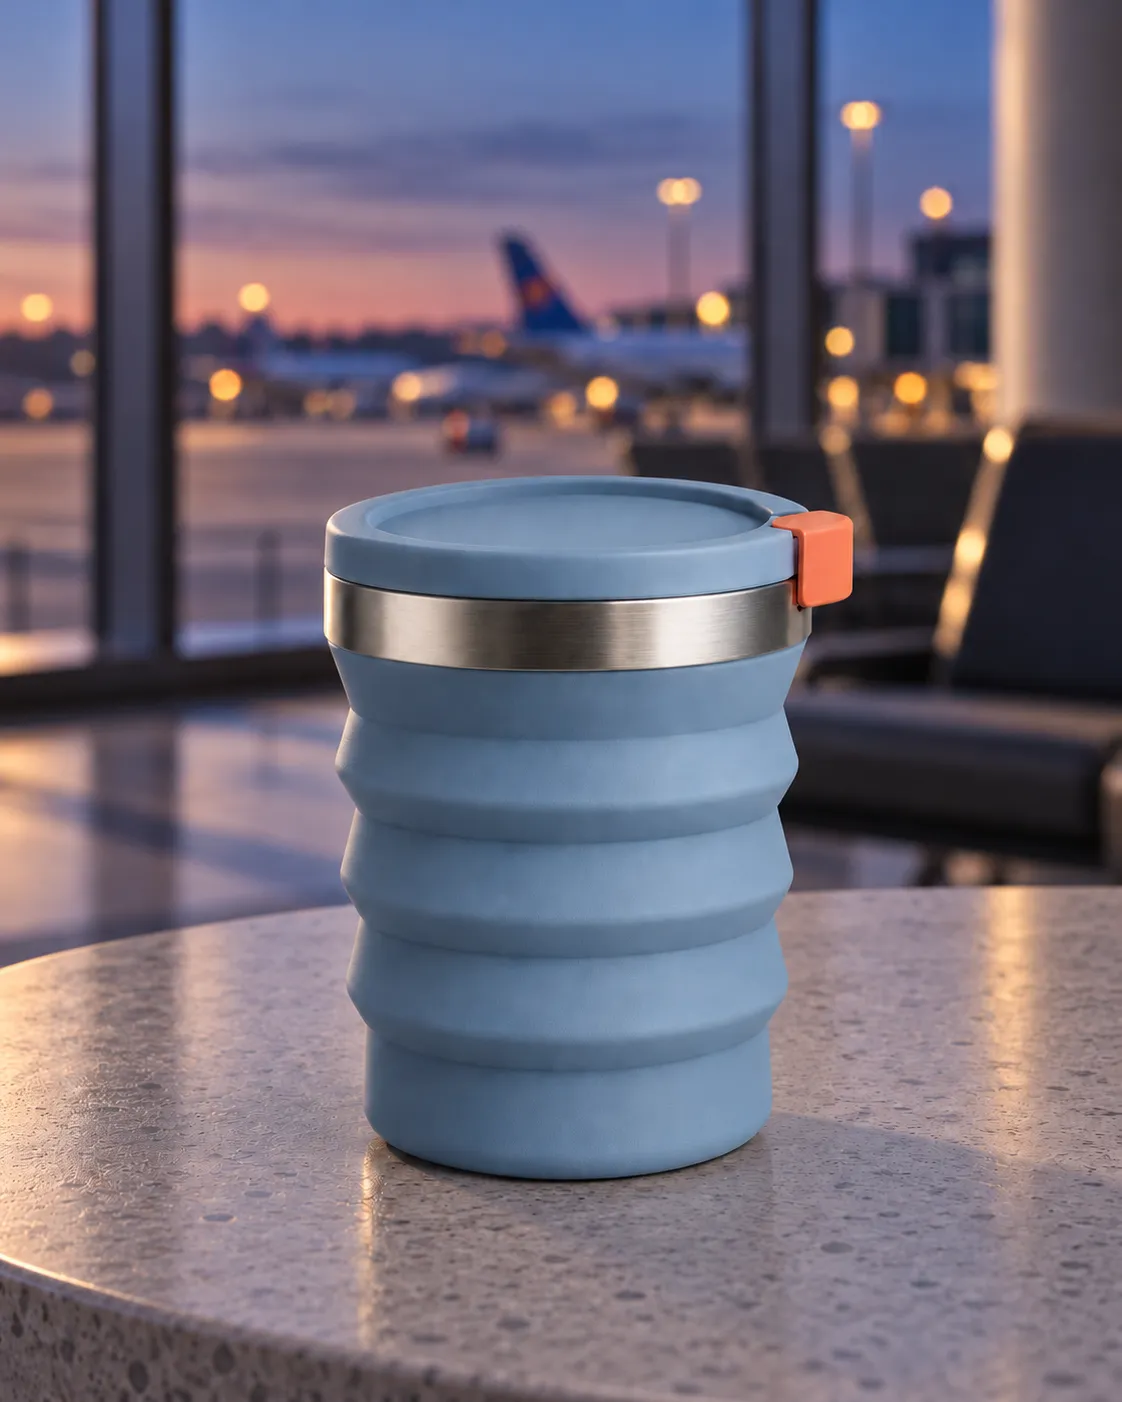
Note: The revised version merely shifts the airport setting to evening; the product, tabletop, camera angle, and overall spatial relationships remain continuous, illustrating “what changes and what stays the same.”
Stage Three: Create the Final Poster with Text
Finally, add marketing copy and layout requirements, such as the headline “Set Off Lightly” and a brief tagline. Keep text-related tasks separate from the initial scene exploration phase; otherwise, if issues arise, it becomes difficult to determine whether they stem from the product, the environment, or the layout instructions.
It’s recommended to first generate a base image with clearly defined layout areas, then test the model’s text‑rendering capabilities. For official trademarks, pricing, or regulatory information, always double-check in your design tools and finalize the layout accordingly.
How to Conduct a Fair Model Comparison
If you want to know which of Lite, 2, or Pro best suits your needs, at least set the following conditions:
Use the same original reference image, without temporarily changing cropping or sharpness;
Use the same prompt, only modifying model options;
Maintain the same aspect ratio, output quantity, and generation rounds;
Do not include model-specific “remedial words” in the first round;
Save records of inputs, outputs, and modifications for each round.
Then evaluate across five dimensions:
Subject Consistency: Are color, proportions, structure, and key identifying features stable?
Text Accuracy: Do spelling, line breaks, hierarchy, and positioning meet requirements?
Spatial Relationships: Are object placements—front-to-back, contact, occlusion, and perspective—reasonable?
Local Modification Precision: When specified areas are altered, do unintended changes occur elsewhere?
Iteration Cost: How many rounds are needed to achieve a usable result, rather than just comparing the first output.
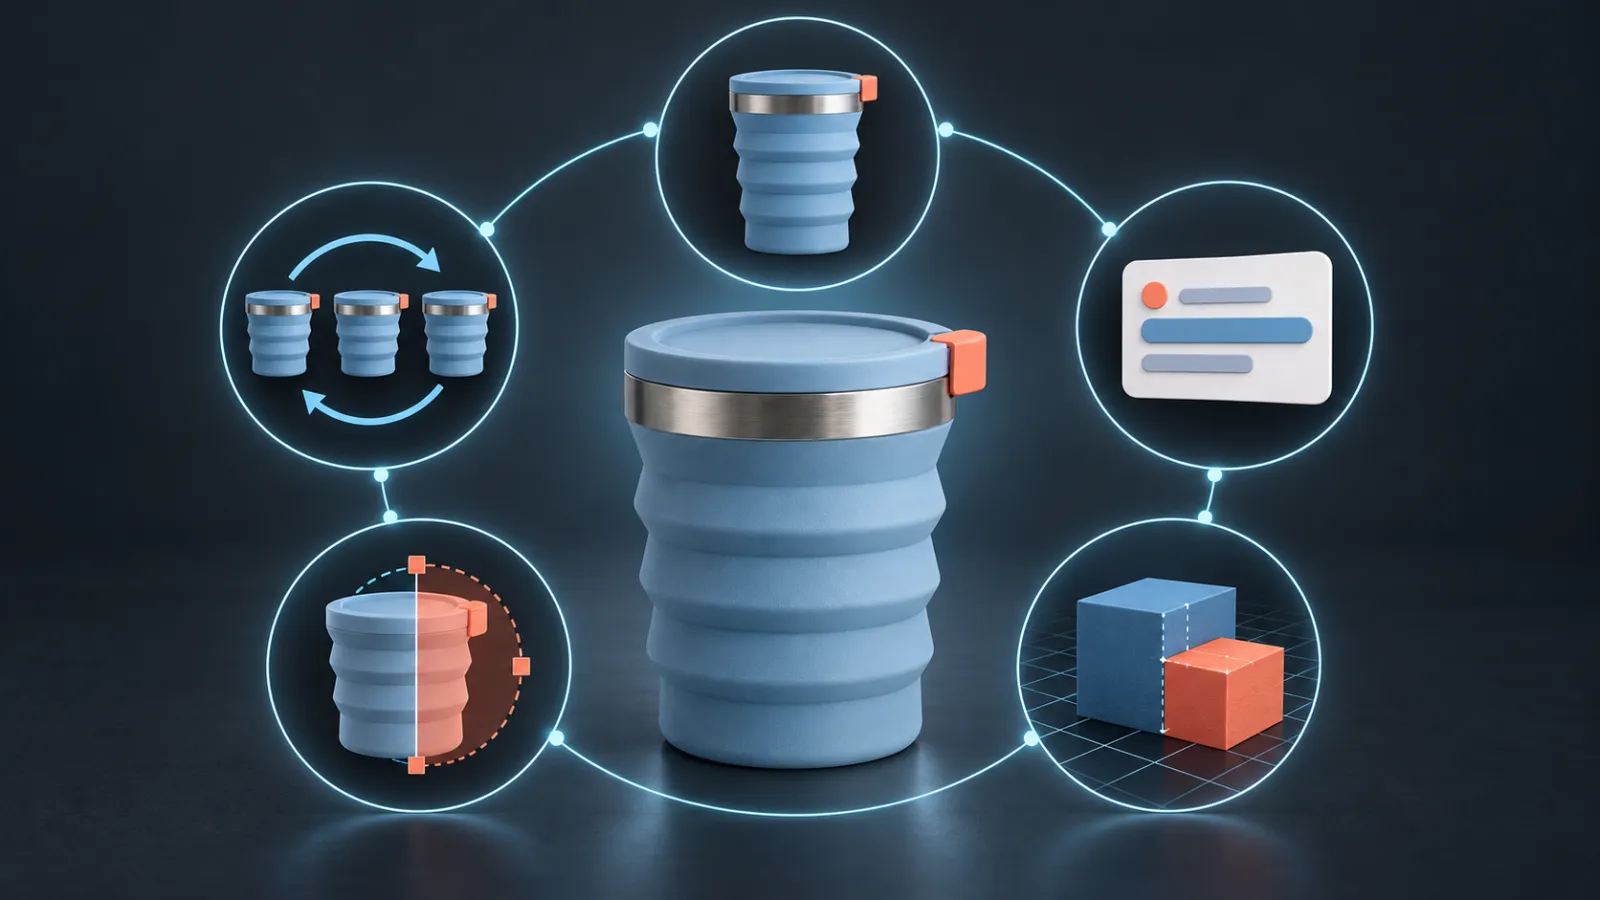
Legend: The five nodes represent subject consistency, text accuracy, spatial relationships, local modification precision, and iteration cost, respectively. This is a neutral evaluation method and does not imply any ranking of models.
Only when inputs are identical can conclusions truly reflect differences between models. Otherwise, what you’re comparing may simply be prompts, reference images, or luck.
Completing a Reference Image Workflow on PixPix
The basic workflow outlined on PixPix’s publicly available Nano Banana page is straightforward: select a model, upload a reference image as needed, write a prompt, then refine or download the generated output.
To make results more controllable, you can divide each request into four sections:
Objective: Where will this image ultimately be used—for example, on the homepage of a product detail page or as a vertical social media poster?
Must-Keep: Product structure, character identity, colors, materials, logo placement, or camera angle.
Allowed Changes: Background, lighting, clothing, localized accessories, or designated areas.
Exclusions: Unnecessary text, extra fingers, duplicate products, incorrect interfaces, deformed packaging, etc.
For example:
Create a 4:5 e-commerce lifestyle image for a foldable travel cup. Must retain three wide, mist-blue creases, the silver rim, and the coral-orange lock on the right side; replace the airport background with a minimalist desk and adjust the lighting to soft daylight from the left side; do not alter the product’s size, position, or camera angle, nor add text, logos, human hands, or a second cup.
If you want to continue making localized adjustments, you can also use PixPix’s publicly available image-editing features, such as local retouching, erasing, image enlargement, or background processing. Addressing just one major issue per round is usually easier to review than trying to tweak composition, materials, text, and lighting all at once.
Common Misconceptions
Treating rumor‑filled headlines as official announcements
Article titles, community screenshots, and code references are not definitive proof of a product’s usability. When verifying model specifications, prioritize consulting Google’s official model documentation and PixPix’s current model page.
Shortening Gemini 2.5 Flash Image to “Nano Banana 2.5”
This conflates the original model’s underlying name with an unconfirmed product designation. When writing articles, creating tutorials, or handing off tasks to your team, it’s best to clearly state both the commonly used name and its official counterpart.
Comparing different models using varying prompts
If each model receives a different task, you cannot judge their relative quality based on results alone. First, fix the reference image, prompt, and canvas size, then document each iteration of changes.
Completing complex tasks in one go
It’s best to tackle product identity, scene design, local edits, and text layout in separate stages. This approach helps pinpoint issues while preventing a single change from undoing previously correct elements.
Assuming platform differences are model differences
Different platforms may offer distinct parameters, default prompts, post-processing settings, and scoring rules. This article only outlines PixPix’s current public interface and standard testing methods, without directly applying practices from other platforms to PixPix.
FAQ
Has Nano Banana 2.5 been released yet?
As of the time this article was compiled, it is neither an officially recognized model listed in Google’s official image-generation documentation nor a standalone entry on PixPix’s current public pages. The related content referenced here reflects code clues and rumors circulating at that time.
Are Nano Banana and Gemini 2.5 Flash Image the same model?
Google’s current documentation associates the original Nano Banana with Gemini 2.5 Flash Image. The “2.5” in the name refers to Gemini’s generational numbering and should not be directly rewritten as “Nano Banana 2.5.”
Which version should I choose for PixPix now?
For quick concepts and lightweight batch tasks, start with Nano Banana 2 Lite; for everyday general creative work, use Nano Banana 2; and for complex compositions, precise text, and final key visuals, consider Nano Banana Pro. Ultimately, always rely on test results under identical conditions.
When working with a reference image, how should I craft my prompt?
First list the identity traits that must remain unchanged, then describe what aspects are allowed to vary and specify any exclusions. Avoid simply stating “keep consistent”; instead, clearly identify color, proportions, structure, accessory placement, and camera angle.
Summary
“Nano Banana 2.5” currently serves better as a search term requiring clarification rather than an official model name ready for direct use. What truly impacts creative efficiency isn’t chasing unconfirmed numerical designations, but understanding the positioning of currently available models and conducting unified, reproducible comparisons through standardized inputs.
In PixPix, you can first establish a general baseline with Nano Banana 2, then select either 2 Lite or Pro depending on whether your task leans toward fast batch processing or intricate finished pieces. Whichever option you choose, always lock in the reference image and primary subject identity upfront, modify only one major variable per round, and thoroughly check text, structure, and local details before exporting.

AI Image Tool Built for E-commerce Teams
For new product launches, advertising, and promotional campaigns, use AI to generate product images, scene visuals, ad creatives, and short video assets — making content production faster.