How to distinguish Nano Banana 2.5 from 2.1: PixPix Reference Image Generation and Local Editing Guide
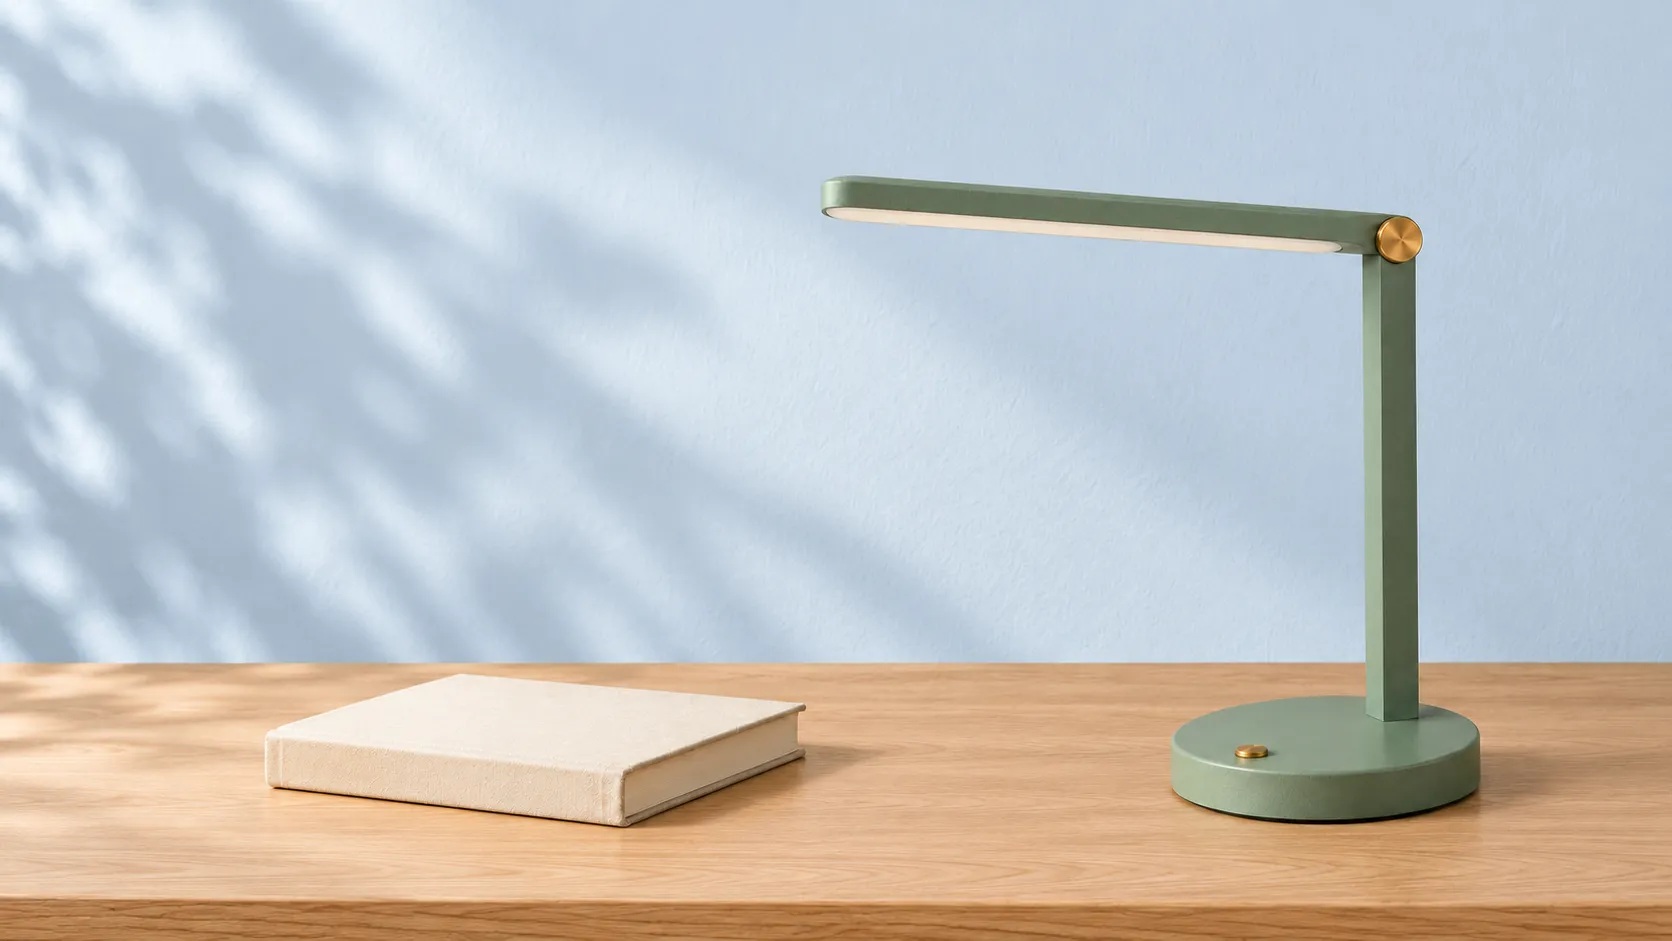
When searching for Nano Banana 2.5, you might encounter early messages, the Gemini 2.5 Flash Image, and the new Nano Banana 2.1. Although their numbers are similar, they cannot be used interchangeably. After confirming the correct name, a more practical question arises: how can you generate a product scene using a reference image, and how can you modify only the background while keeping the correctly rendered product intact?
This article first clarifies the naming conventions, then uses the original “Qingye Folding Reading Lamp” example to explain PixPix’s method of creating reference images, providing three replicable general templates: establishing a product reference, generating a desk scene, and changing only the wall color.
Nano Banana 2.5 vs. 2.1: First, let’s clarify the names
As of October 16, 2026, Google has publicly released the model documentation for Nano Banana 2.1, and PixPix’s model library also lists this option. When selecting a model, you can first verify the following three easily confused names.
Name | How should we understand |
|---|---|
Nano Banana 2.5 | A term previously used in early reports; official materials reviewed here do not recognize it as an independently released model, nor do they confirm it as an alternate name for version 2.1 |
Nano Banana 2.1 | The image generation and editing model currently listed officially by Google, with model code |
Gemini 2.5 Flash Image | The official name of the original Nano Banana; here, “2.5” cannot simply be rewritten as Nano Banana 2.5 |
Naming basis: Google’s Nano Banana 2.1 documentation, Google’s original Nano Banana documentation, and PixPix’s current model library.
Therefore, there is no need to infer hidden options based on old search terms. Simply open the current model library, locate the officially listed Nano Banana 2.1, and verify the available options provided by the interface.
Which capabilities of Nano Banana 2.1 deserve attention?
Google describes version 2.1 as an update to Nano Banana 2, with improvements focusing on image quality, instruction execution, consistency of figures during continuous editing, and text presentation. For creators, these areas translate into specific checkpoints: whether the product has deformed, if local modifications affect other regions, and whether the text in the image is accurate. Google’s official explanation
PixPix’s dedicated page for Nano Banana 2.1currently introduces three thinking modes—Minimal, Medium, and High—alongside natural language-based partial editing and output resolutions of 1K, 2K, and 4K. Actual selectable parameters, model costs, and account availability will be determined according to what is displayed on the platform at the time.
When preparing visual assets for a product, it’s recommended to first lock in one mode and output specification, completing an initial composition check. Only after confirming the product’s structure is correct should you consider the final delivery size. If you simultaneously change the mode, aspect ratio, prompt words, or reference image, it becomes difficult to determine which modification influenced the outcome.
High resolution does not replace content verification. Google’s model card still lists limitations such as small text, figure consistency, and left-right spatial relationships; before formal delivery, each task-related detail should be carefully checked. Google’s model card
Original case study: Start by fixing a single reading lamp
“The Qingye Folding Reading Lamp” is a fictional product created for the purposes of this lesson. It bears no brand logo and does not reflect the features, dimensions, or performance specifications of any real-world product currently available on the market. We establish its identity through several easily verifiable characteristics:
A matte fog-green lamp body with a round, thin base.
On the front side of the base, there is only one small brass circular button.
A single slender upright pole topped by a brass circular swivel joint.
The elongated lamp head extends toward the left side of the frame, with a continuous off-white diffuser at its base.
The lamp remains completely turned off throughout, allowing us to isolate and examine changes in ambient lighting from the lamp’s own illumination.
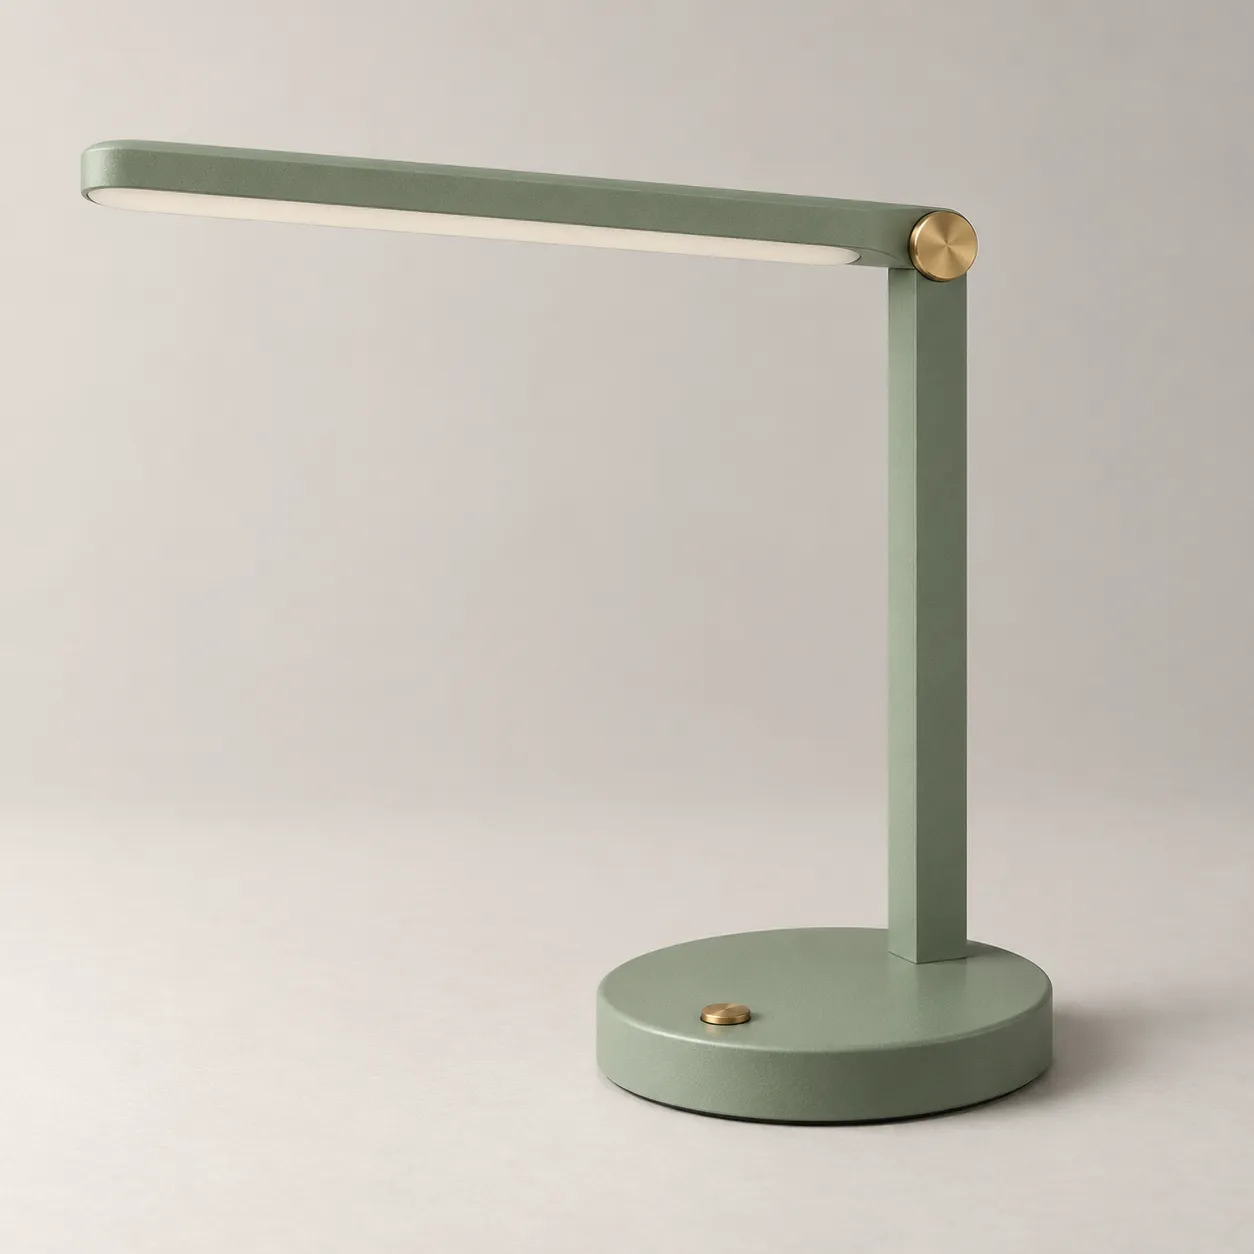
Caption: The reference image clearly highlights the lamp head, the upright pole, the base, and two brass details; subsequent scenes will be evaluated based on these identifying features.
If you have an actual product, please upload clear photographs rather than attempting to recreate its appearance solely through text. Photos should ideally capture the full silhouette, key interfaces, and materials, while avoiding strong reflections or obstructions that might lead to misinterpretation.
If you’re simply developing an original concept, you can use the following general template: Reference Image of the Product.
Create a reference image for a fictional, unbranded folding reading lamp. The lamp features a matte fog-green body, a round, thin base, and a small brass circular button on the front of the base; a single slender upright pole topped by a brass circular swivel joint connecting to an elongated lamp head extending toward the left side of the frame, with a continuous off-white diffuser at the base of the lamp head. Keep the lamp turned off. Use a light warm gray background, captured from a three-quarter angle on the front side, fully showcasing the lamp head, pole, and base, with soft studio lighting coming from the upper-left corner and natural contact shadows cast by the base. Do not add text, logos, packaging, cords, or any other objects.
In this round, focus first on selecting the exterior form without rushing to include rooms, characters, or marketing copy. Save the reference image once it has passed inspection, as a shared input for later stages.
Advance from the reference image to localized editing within PixPix
Prepare your input and select a model
From the PixPix Nano Banana 2.1 page, enter the creation interface, verify the model name on the workbench, then add the required product reference image. Clearly state the intended purpose, scene content, and any non‑negotiable details; specific button placements and parameters should follow the current interface operations.
For this case, only one product reference image is needed. In tasks involving multiple reference images, explicitly specify which image defines the product, which provides spatial context, and which contributes color schemes, thus preventing several images from simultaneously vying for control over the main visual identity.
Generate a checkable desk scene
The goal of the second round is to place the reading lamp into a space, rather than redesigning it. Use the product reference image as input and try the General Template Two: Desk Scene.
Use the same Qingye reading lamp featured in the reference image, retaining its matte fog-green body, round thin base, brass button on the front of the base, single upright pole, brass swivel joint at the top, and the elongated lamp head extending toward the left side of the frame along with its off-white diffuser. Keep the lamp turned off and maintain the product’s original proportions. Place it on a light oak desk against a warm off-white textured wall, with a closed, blank white cloth book positioned on the left side of the frame. Soft natural light enters from the left, casting natural contact shadows on both the lamp base and the book. Use a horizontal composition to fully showcase the lamp, ensuring the book does not obscure the product. Do not add people, electrical cords, additional lamps, text, or logos.
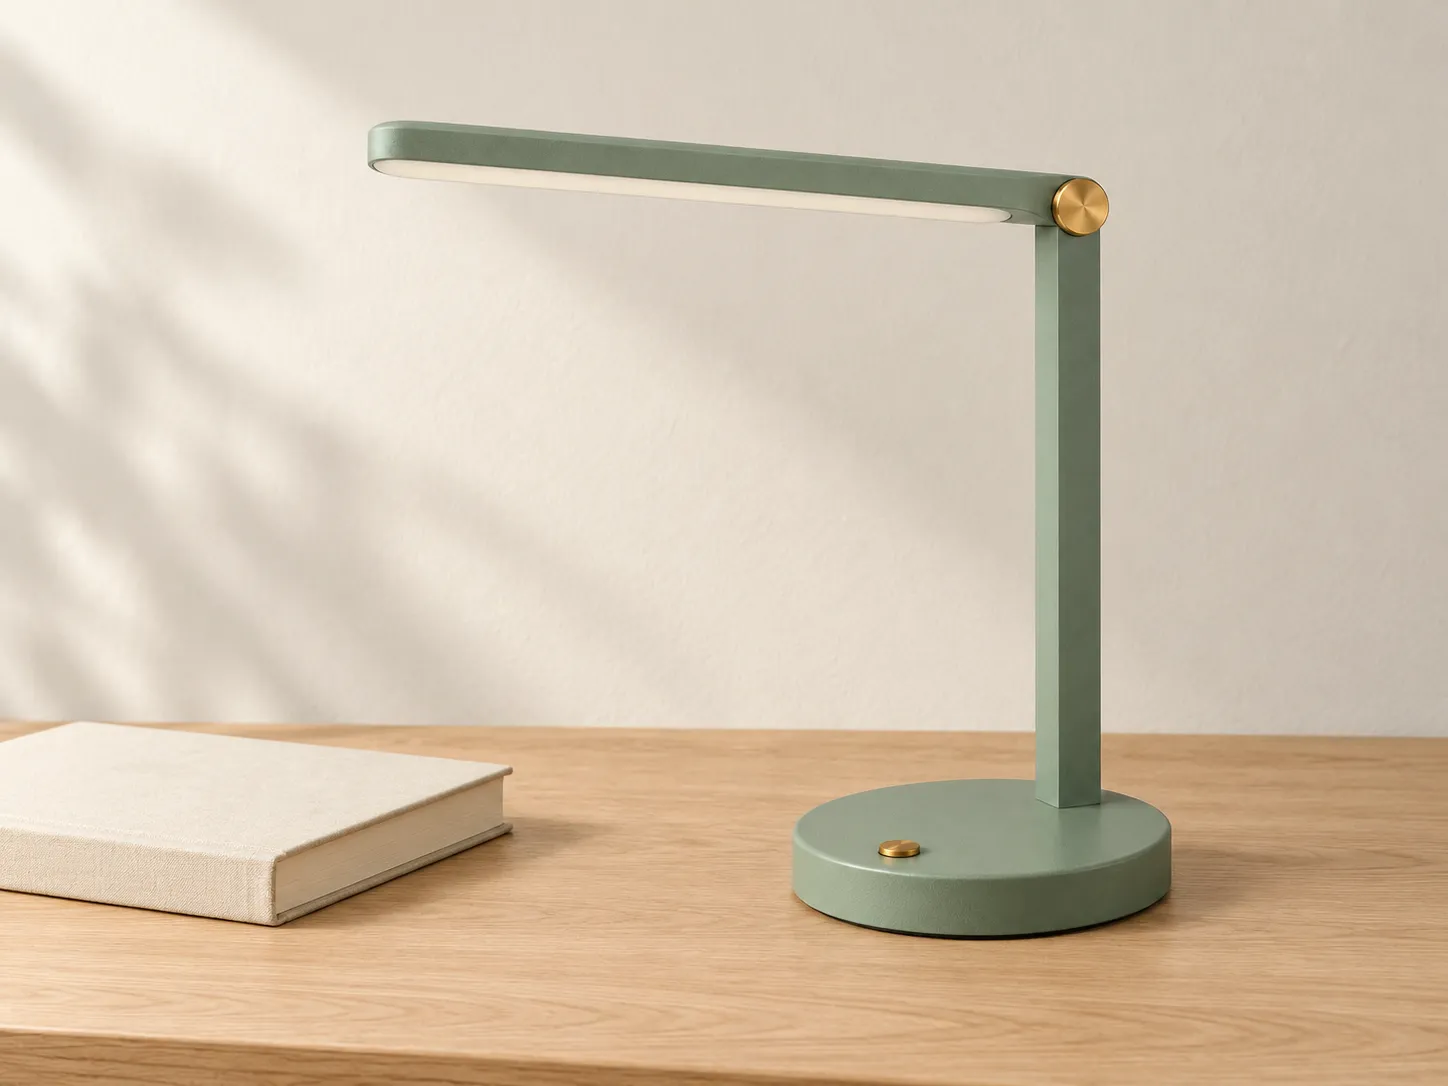
Caption: The desk scene introduces environmental elements and a book, yet the product remains the sole protagonist; first assess whether the structural integrity is maintained, then evaluate material quality and contact shadows.
During inspection, first examine the connection between the lamp head and the pole, followed by the base’s outline, number of buttons, and position of the swivel joint. Once the product’s structure passes inspection, proceed to check whether the book obstructs the main subject, whether the wooden desk’s perspective appears natural, and whether the lighting interacts harmoniously with all objects.
Only change the wall color
If the composition is already satisfactory, use this scene as the next editing input. At this stage, retain the selected version and experiment with the General Template Three: Wall Color Change on the new version.
Only change the background wall’s base color from warm off-white to a low-saturation light blue, while preserving the wall’s subtle texture, original light-and-shadow contrasts, and interplay of light and shadow. Keep the reading lamp’s position, size, angle, mist-green body, brass pivot, base button, and off-white diffuser unchanged, and leave the lamp turned off. Maintain the book’s position, shape, and color, as well as the wooden table’s texture, camera setup, framing, and contact shadows. Do not add any props, re-light the scene, or crop the image.
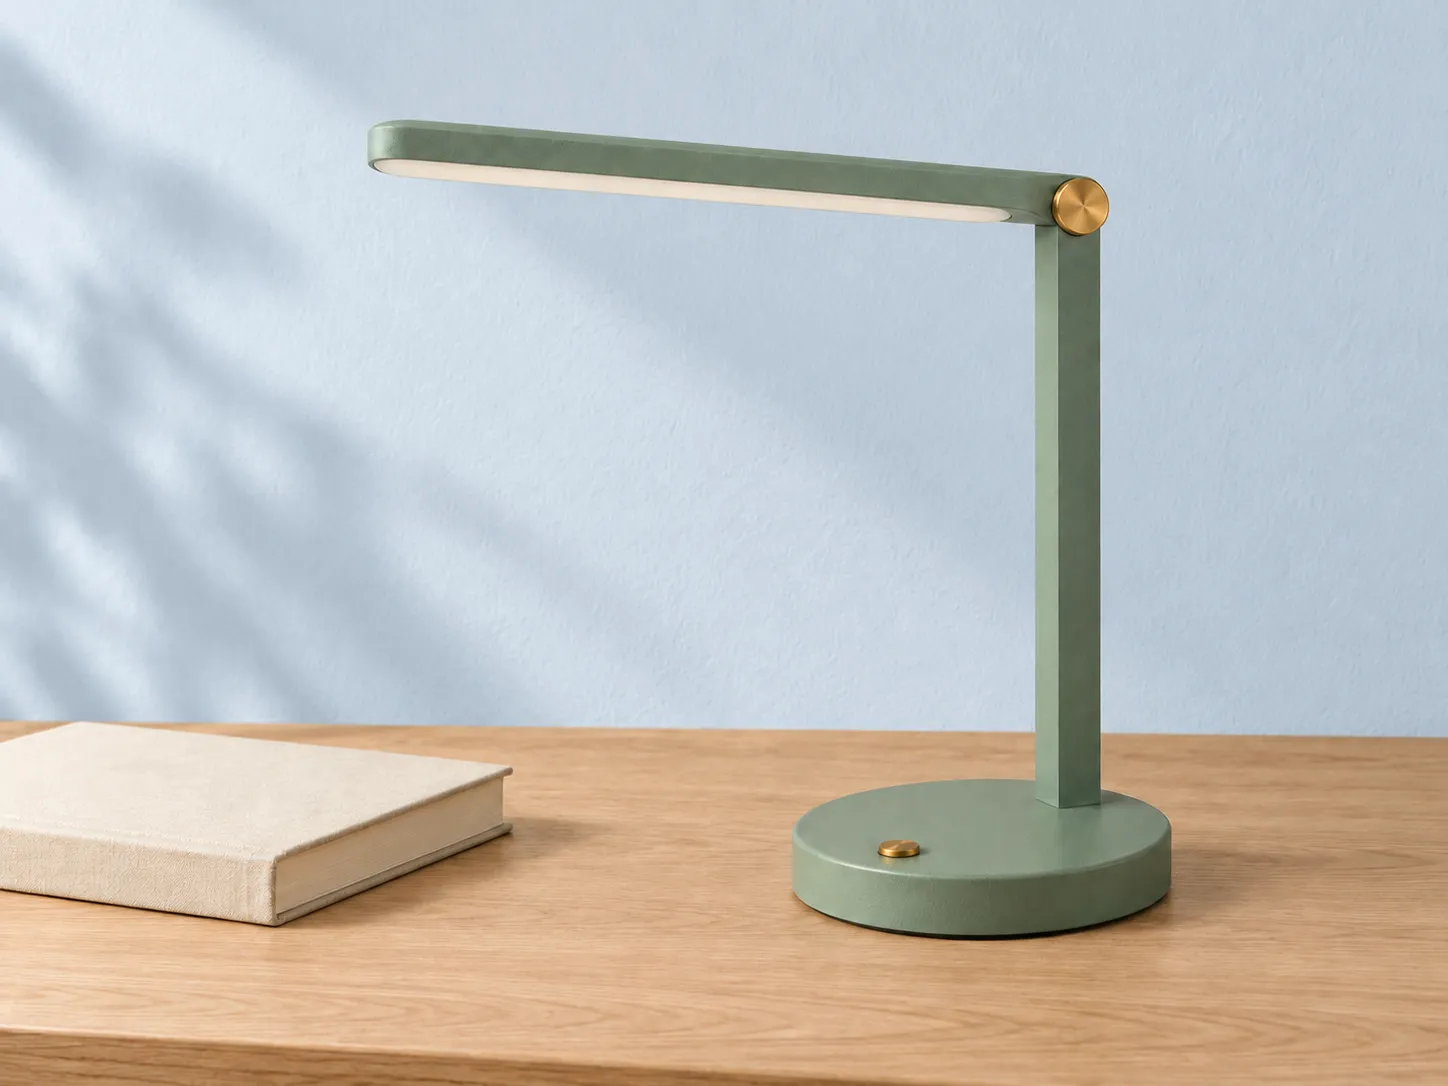
Caption: The editing focus is on the wall’s base color; compare with the previous image to check whether the lamp body, buttons, books, or tabletop have undergone any unintended changes.
“Changing only the wall color” is easier to approve than “switching to a fresher style.” The latter might simultaneously alter exposure, props, and product colors, causing even previously correct elements to be regenerated.
When deviations occur, make corrections according to the issue.
Observed issues | How to write the next round |
|---|---|
The lamp head has been shortened, and the pole has become thicker | Return to the product reference image, pointing out that the lamp head length and pole thickness need to be restored, and temporarily refrain from adding further scene details |
The base now features extra buttons or interfaces | Clearly state that there is only one brass button on the front side of the base, and remove any newly added structures |
The lamp appears glued to the tabletop | Point out the contact area between the base and the wooden table, requiring alignment with the left-side daylight and shadows close to the base |
After changing the wall color, the entire image appears bluish | Limit the wall color change, demanding restoration of the original colors of the lamp body, books, and wooden table |
The lamp head has been cropped away | First adjust the composition and white space to confirm the complete outline, then proceed to detailed editing |
Address only one major issue per round. If continuous editing begins to deviate the product from the reference, revert to the most recent version that passed inspection and reintroduce the product reference image; do not accept incorrect structures just to preserve the latest background.
If your current task requires clearly defining the modification area, you can also refer to the local retouching options provided by the PixPix image editing tool . First confirm the editing scope, then specify the desired effects and items to retain.
How to determine whether it suits your product
To compare 2.1 with your usual model, we recommend using the same reference image, the same prompt, the same aspect ratio, and output specifications supported by both models. Keep the number of generated images and allowed revision rounds consistent, then record the following results:
Product identity : Does the lamp head length, base shape, pivot, and buttons remain consistent?
Environmental integration : Are the lighting direction, contact shadows, and tabletop perspective natural?
Instruction scope : When only changing the wall color, are the product and books inadvertently altered?
Delivery Details: Zoom in to examine edges, metal textures, and the diffuser for any sticking or redundant structures.
Correction Workload: From the initial image to the final usable version, what adjustments are actually required?
Only by completing such documentation can you draw conclusions regarding your own task. The example images in this article are intended to illustrate creation and inspection methods and do not provide model rankings.
Frequently Asked Questions
Has Nano Banana 2.5 been renamed to 2.1?
The official materials reviewed do not confirm this renaming. When writing tutorials or documenting handover requirements, use the current official name, Nano Banana 2.1; if encountering the old designation, verify the article’s update date and consult the official model documentation.
Where should I start on PixPix?
You can begin by visiting the Nano Banana 2.1 page to understand its capabilities and dive into creation, then cross-check the actual model and parameters in the workspace. Examples and instructions provided on public pages cannot replace your own thorough review of your product.
Does a higher mindset or larger resolution always mean better suitability?
Judgment should be based on results from the same task. First, establish fixed settings to check composition and product identity, then compare other options; simply increasing output size does not guarantee that the product’s structure, colors, or text have been properly addressed.
How should text in product posters be handled?
It is recommended to first obtain a base image with correct structure and appropriate negative space, then proceed with handling titles and selling points. If the model needs to render text, write out each word, including position and hierarchy, and verify them individually; pricing, model numbers, and official product information can be finalized through design tools.
Five Things to Check Before Exporting
The product’s exterior shape, structural components, and key identifying features match the reference.
The color‑changing range does not inadvertently affect the lamp body, books, or wooden table.
The lighting direction, contact shadows, and perspective of lamps and props are well coordinated.
The frame size meets the intended purpose, and neither the lamp head nor the base has been accidentally cropped.
All text and product information have been thoroughly reviewed, ensuring no fabricated functions or performance claims exist.
Once you’ve prepared your product reference images, you can start by creating a scene illustration on PixPix Nano Banana 2.1. After verifying the structure, proceed to make individual modifications—this way, each round will have clear acceptance criteria.

AI Image Tool Built for E-commerce Teams
For new product launches, advertising, and promotional campaigns, use AI to generate product images, scene visuals, ad creatives, and short video assets — making content production faster.